80% of the thousands of questions the Golden material specialists team receive every year are about… varnishes! So let’s just be clear right from the start, I will not be able to give all the answers here you might need. Hopefully though this will give you a better theoretical understanding of them and then… practice will be up to you anyway!
Sarah Sands, the head of the materials team at Golden, thinks it’s because varnishes not only come on top of your painting (and by that she also means the last layer is often left to the last minute) but also late in your career even! How’s that so? Well at art school -if you went- they probably taught you that varnishing oils was a must but… acrylics… no, not really. Until that is you have your first big show/reputable gallery and you begin to wonder: “Maybe, now that my paintings are worth a bit, I should protect them and varnish them?” At that stage the photographer is booked for next week, you rush to buy the first bottle you see on the shelf and do an awful job of it! The product can’t do it all… as you’ve probably noticed in other areas of your artistic journey! Practice at varnishing will make it perfect and some artists, yes, get this impeccable smooth matte surface but it’s not the varnish which should be admired but the varnisher… presumably, in that case, someone with years of obsessive skill development and control of conditions / materials.
Don’t panic… you will get the hang an acceptable result soon enough and most varnishes will be fine for acrylic paints. Also, there are so many options available that, in truth, it’s a bit criminal to miss this last stage in your painting! Why bother at all? Well, because you don’t know what destiny your artwork will have… it may end up over a chimney, in a smoker’s home, rain may leak from that ceiling over it or heavens forbids someone trips, it drops and the surface gets scratched, etc… you get it. Varnish is a final layer (harder than paint) that truly coats and protects your artwork. It will bare the first brunts and, if any of the above happens, a restorer (or your good self) can remove the varnish and, when the painting is cleaned or restored, reapply coats of varnish on top of it… good as new!
IF you really want to drive out of business half the restorers in the museums… add an isolation coat before you go to varnishing proper. This permanent, non-removable coat will totally protect your paint film if / when the varnish has to be removed. It also seals in the painting, making varnishing an easier job. Please practice on unimportant works as this procedure is tricky, non-reversible, and can alter a bit the ‘feel’ of your painting… if you hate it… skip it!
Isolating mediums exists for oil paints too but that’s another story. On acrylic paintings, if you want to brush the isolation coat (not so easy to do on impasto work or mixed media works with bits in them) dilute Golden’s Soft Gel gloss by adding 50%+ water to the gel. If you want to spray a 2:1 mixture of Golden GAC-500 to Transparent Airbrush Extender can be applied with an airbrush or spray unit. One to two coats are enough (except on very absorbent surfaces when you only stop when a satin surface has been achieved… this is vital before applying a matte varnish on that absorbent surface as it might “cloud” or “frost”). Let each coat dry six hours for good measure -if it’s still tacky a bit longer- and a full 24 hours before varnishing proper.

When can you begin this process? You can apply your isolation (or varnish) coats just a few days after finishing your painting… it’s really one of the major advantages of acrylic paint. If you are in a very humid environment or if you have thick layers… give it as much time as you can afford but never stack your paintings and certainly never front to front as in fresh paint our still active friends (the little polymer hooks) will only be too happy to grab their friends on the other painting and stick together… You can’t blame THEM, they know no better… but now YOU know. Allow yourself enough time however because all these layers will take some days to dry and you do need to let your final varnish layer cure several more days before packing and transporting… and, it hopefully goes without saying, but I’ll say it anyway… do not repaint on your varnish.
OK! Varnishing… breathe deeply. There are three ways to go about this… applying with a cloth (wax varnish only), brushing or spraying (forget sponges, rollers etc… they leave holes in the film, produce uneven coats and… too long, just forget them.)
If you choose the brush, you have a further choice to make between Polymer/Polyurethane varnishes (strictly for acrylics) or Mineral Spirit / Solvent based varnishes (those are also suitable for oils and paints). Sprays on the shelves are all solvent based. These options come in Gloss, Satin or Matte (except wax varnish which is matte but can be buffed to a satin sheen), but note that satin and matte varnishes will lighten the appearance of your darker colours.
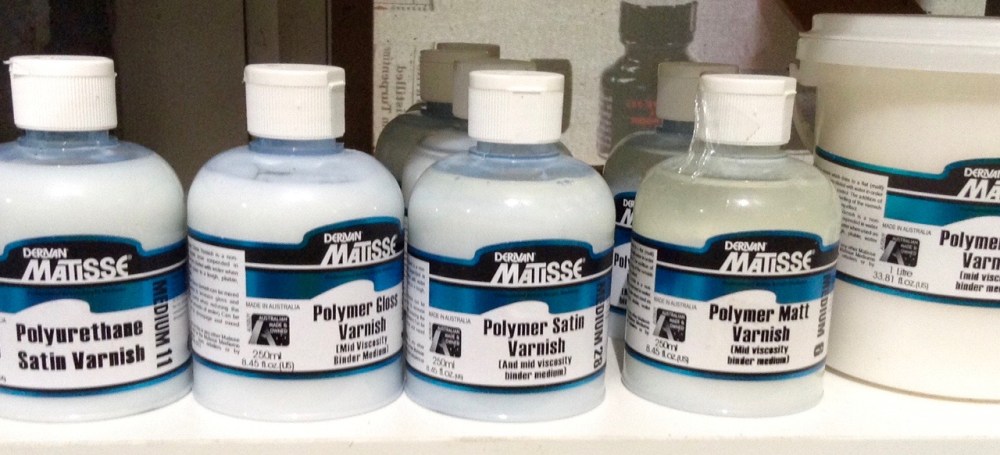
Water-based Polymer Varnishes resemble a liquid gel but are harder than a normal paint film. Still they are not formulated to protect anything that you touch often (a chair, a table) or for anything that will go outdoors even if a UV protection is included in the varnish. Depending on the company, these varnishes sometimes have to be thinned (as matting agents tend to sink to the bottom.) Thinning has the advantage of releasing any foaming but is a bit boring to do… follow instructions given. You can usually also spray this varnish but I don’t think you can buy it ready-made… again, follow instructions.
Water-based Polyurethane Varnishes are harder wearing than the polymer ones but are not flexible enough for use on canvas… they are best used on boards, wood, etc. and should not be diluted.

Solvent-based Varnishes are made of acrylic resin dissolved in mineral turps/spirits. These tend to have a more WOW effect in gloss than above products as they refract the light better (a final coat of gloss spray varnish further emphasizes the trick too). They are also harder, less foamy and tacky if slightly less flexible, but suitable for use on canvas. All varnishes dry clear of course but as these are clear from the start, they are also a bit easier to apply. As each and every brand has their own formulation, it is best to follow instructions on the label regarding ratios and thinners but… most brands do make you work a bit! The same product used for thinning should also remove that varnish.
If thinning is not necessary…. shake well (especially Satin and Matte) before use as the matting agents go to the bottom of the jar.
Hard Solvent-based Varnishes are for murals and other outdoor applications, they usually have a UV protection added and behave more or less like above solvent based varnishes… follow instructions on the labels though.

Brush application takes some practice, as said above, and testing is recommended too. Dedicate a good quality, soft, lean flat brush to varnishing alone (you don’t want to have to pick up a stray bristle in that tacky film and probably you’ll only see it too late anyway). The brush size will depend on your work’s size of course but as big as you can handle with ease. If your work is small enough to varnish flat, this will avoid potential drips (although you should never have that much varnish on your brush in the first place) but held tight in the cradles of an easel might be easier. For rather big ones your arm may not extend to the centre of your artwork and so… no choice except spraying of course or a scaffolding as in museums! For really 3D pieces go with spray to avoid very slow drying in the pools of varnish that will form in the cracks, the nooks and crannies of objects, etc.
A shallow dish, dip only half your brush in it and on you go… not at the top left corner (as all of us seem to do automatically because that’s where we begin a page I think) because if you begin there you are far from the other side and it’s hard to pull your varnish across the surface and it’s also too close to the edge of that corner to do a cool job as it will leave too much varnish in that spot. Divide mentally your canvas in squares you can manage with your brush without over stretching, apply a few crosses of varnish in each sector, then pull the varnish along and to the sides going all the way out. When done, unify it by slow systematic sweeps one way and in the same direction then the other way, also in the same direction. After that open a bottle of nice wine and put your feet up… while it dries thoroughly. You’ve done your first coat, it’s time to celebrate… but don’t get too drunk, you can apply another coat in about 3 to 6 hours! And two coats usually does the job.

Spray application begins with two full minutes of rock and roll (or twist or Charleston… you choose). Basically your can of needs to be shaken, baby… so why not shake along!
In an ideal world you can do this outdoors on a windless day, as microscopic particles of tacky, invisible resin are only too easily breathed in and stay in your lungs forever, otherwise a paper mask and good ventilation should do the trick. After the shake, a good varnish will flow like a breeze through that nozzle BUT (just in case) always begin your spraying outside of your painting and, when you are confident it’s delivering an even spray, go for it one way, then the other… evenly, thoroughly, then wait a few hours… rock n’ roll some more and start again. Until you’re happy with the result and feel you have an even, serious coat of varnish on (3? 4 times?… these coats are much thinner than brush applied ones). PS: there are some archival spray varnishes (with UVLS) out there so if you really like this better it is totally a safe option just… buy the right one!)
Complications do happen! Apart from the obvious ones… room temperature too high/low, product faulty/too old, brush hairs embedded in varnish… yes, you can also end up with milky films, a bubbly film and a few other scenarios I will not share with you as you might give up on varnishing altogether. When in doubt or in a crisis call your supplier and by that I mean the people who make the product rather than your shop and discuss the issues. There are too many variables to answer all of these here. Usually they are concerned and helpful. They also know their products best.
Clean brushes, trays, spray nozzles,etc. as soon as you are done. Polymer varnish when still wet can be removed with water (50-50 ammonia /water after that). Solvent based ones with mineral spirits or recommended solvent
How to remove varnish? In truth, you don’t really want to be the one removing your varnish… best left to a restorer with a mask, the adequate equipment etc. But will I convince you? probably not so… polymer varnishes can be removed with household ammonia (avoid ammonia with a scent added or varieties that may contain soap) and mineral spirit varnishes with a solvent. If you want to stay in a range, some offer that too (Golden has an MSA Solvent for example). Other companies should let you know on their labels what to use: turps, white spirit, etc.
There are other methods I’m sure but I’ll give you the one I know… Test an invisible area if possible and go gently with tight cotton buds on an angle in little circular motions (make them yourself by wrapping loose cotton on a stick as you will go through a lot). Punch a whole in the lid of a jam jar to drop your soiled buds… it will be less intoxicating! You will soon get a feel for when to stop as when you hit the paint film proper with your harsh solvent it will move it a bit. I’ve seen my mother -who was an art restorer- do this for hours on end so letting you know too that patience is a vital ingredient!!
Varnishes yellow in time don’t they? Yeees and no. Probably not in your life time if you’ve used a good product and the artwork is treated reasonably well… so I wouldn’t worry too much. Also, that’s what varnishes are for. They collect dust, they yellow… you clean the ‘painting’ (the varnish actually) or remove the varnish and reapply… done!
